Ad1

Friday 27 June 2014

Bengali Rasgulla by Garima Sarolia Narera (Guest Post)


Hello everyone, today I would take an opportunity to introduce you all with one of my close friend and food blogger Garima Sarolia Narera. I met her on CAL and really appreciate not only her cooking skills but also a wonderful writer cum poet in her. Apart from it she is a lovely women with full of enthusiasm and her bubbly nature makes her a perfect lady :)))). Recently she has started her new venture of blogging and I would like to congratulate and wish her success :)
She is also very well known as "Rasgulla queen" at CAL, so just thought and took this opportunity for a guest post of Rasgulla recipe. Rasgullas don't need any introduction but for my foreign country readers - Rasgulla is basically a Bengali dessert, its cheese based ball, soaked in sugar syrup and served chilled. So lets go for the recipe, Over to you Garima :)


I am delighted to be invited to Priyanka's wonderful blog. She is such a talented and vivacious person and I constantly enjoy trying out her recipes.
I am here with a recipe very close to my heart and one that I have perfected after several trials. It was also the first post on my blog :)

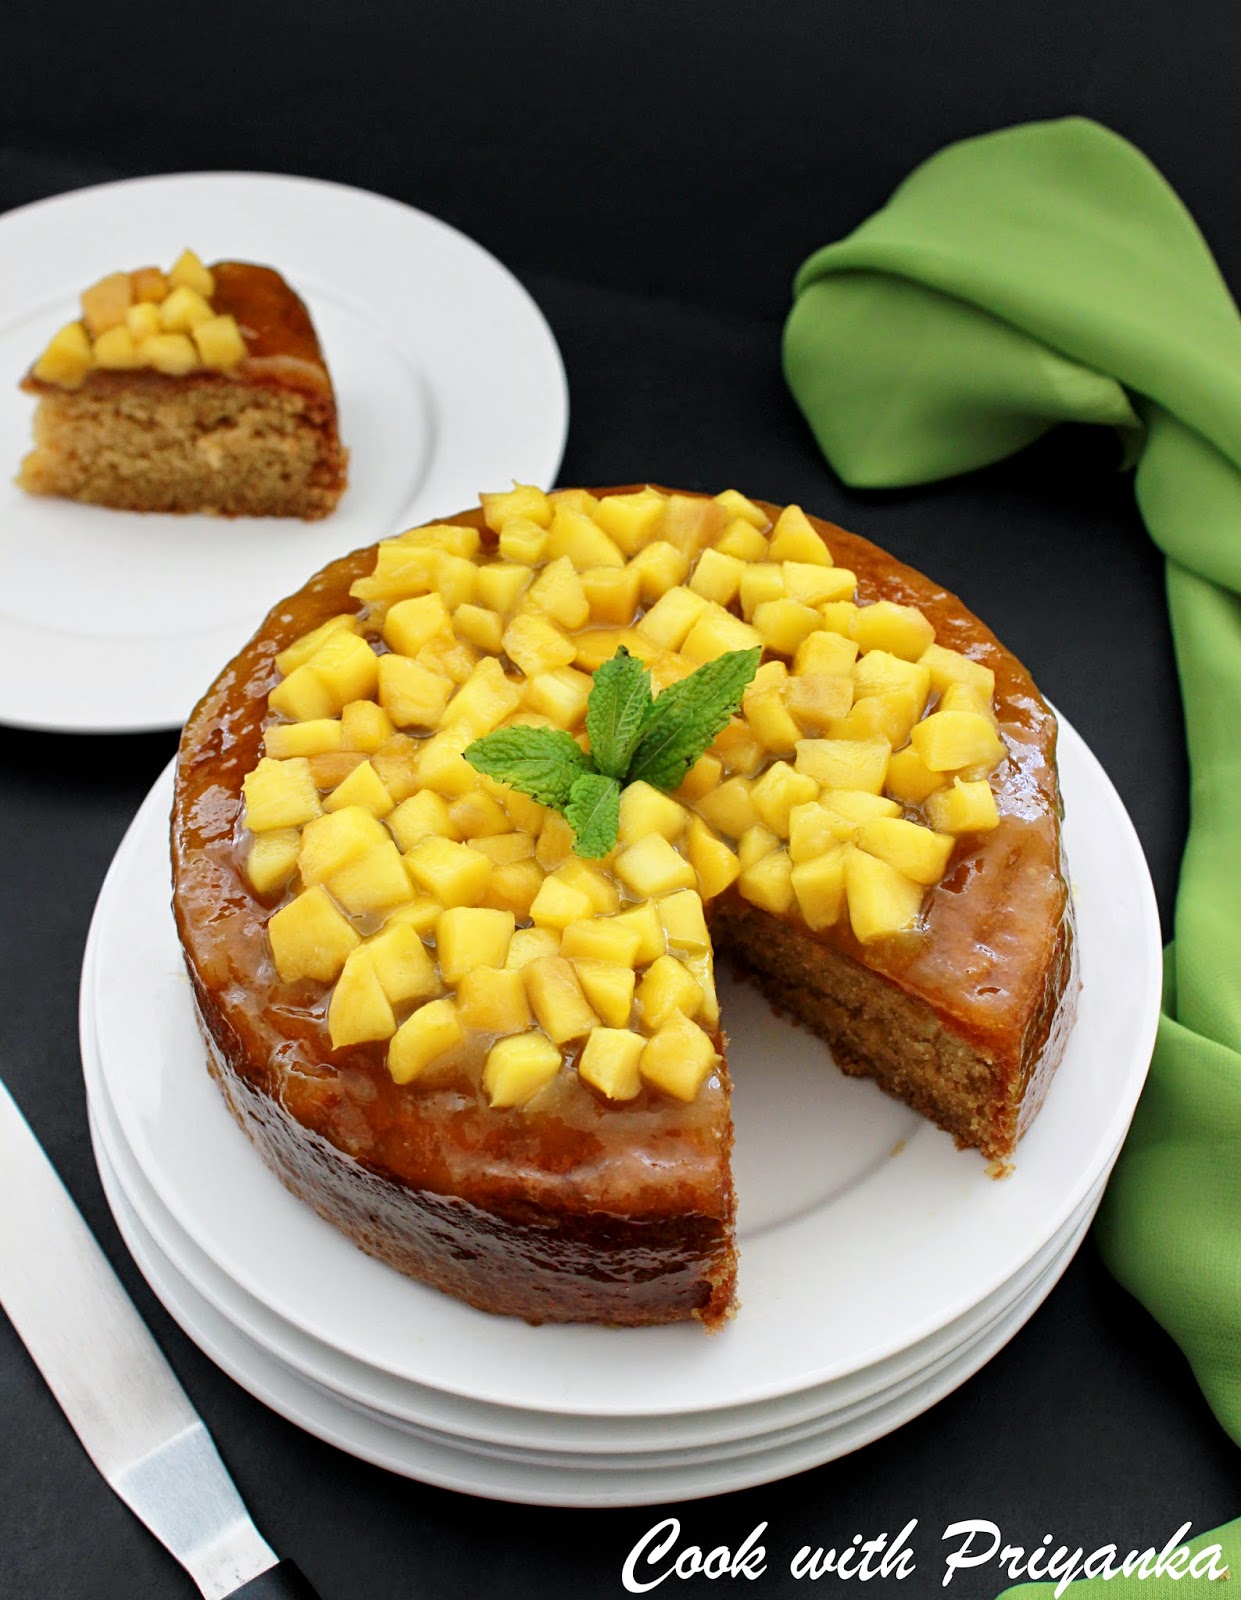
The sweet delight from the Bengal- rasgulla. A dessert which is everyone's delight and can be an occasional indulgence even for the health conscious. 


RASGULLA 
For the Rasgullas you need
1 Litre cow milk, cream removed (I buy the milk an evening prior, boil,cool and refrigerate. Next morning, remove the cream and proceed to make chenna/paneer)
1-2 Tablespoons Lemon Juice
To Make Chenna
(Here is a step wise guide to making paneer/chhena at home)
 Bring the milk to boil, add 1-2 tbsp lemon juice gradually so that the milk mass and whey separate completely.Add 10-15 ice cubes. Rest for a minute.
Strain in a colander lined with muslin/cheesecloth. Wash thoroughly with fresh water to remove the lemony sourness. Drain the water by squeezing. Knot the muslin cloth and hang it  to get rid for any excess whey/liquid.
After about 10-15 minutes, remove and rub the chenna with fingers and heels of the palm till the chenna gives out some fat/ ghee/chiknaayee. It takes me about 5 minutes to get there. By now the chenna is like a dough ball that comes together easily, neither too hard nor too soft.
Take pinches off the dough and make small balls, you should get about 15. Remember, they are going to double up on boiling so size them accordingly.
For the Sugar Syrup 
For the Light Sugar Syrup to boil the rasgullas
1 cup Sugar
5 cups Water
1/2 tsp fine cardamom (ilaichi) powder
For adding to the Light sugar syrup after boiling the rasgullas 
1/4 cup Sugar
1/2 cup Water
8-10 saffron strands (optional- I haven’t used here)
While you make the paneer balls, bring to boil 5 cups of water with a cup of sugar (light sugar syrup). Add half a tsp fine cardamom powder. Just as the syrup comes to a rolling boil, add in the rasgulla balls. Boil covered for 12- 15 minutes on medium flame.
I make my rasgullas in two batches so that the rasgullas get enough space in the water to expand and also keep their round shape.
You may uncover to check every 5 min minutes. Switch off the gas. Transfer gently to a big bowl full of clean drinking water. There should be enough water for the paneer balls to float freely.
Add one fourth cup sugar and half a cup of water to the same light sugar syrup in which the rasgullas were boiled  and give it a boil so that the sugar melts. Add in the saffron strands when the syrup becomes warm, do not add while it is hot.Let the sugar syrup cool to room temperature ( takes about 30 minutes)
Remove the rasgullas from the plain water, squeeze gently and drop into the sugar syrup.
Chill for three hours. You may top with some finely slivered pistachios and almonds.
 
Enjoy!
Garima

Wednesday 25 June 2014

Indian Chicken curry


Hello Everyone, today I have got a recipe for a very delicious and lip smacking chicken curry. Made up with the regular spices it has the most authentic taste. Its the way I am preparing it since many years and always liked by everyone. Its a very good option for a get together as well. I always keep this in my menu when Guests are arriving home. Its an easy and simple way to impress others :)))
There is no marination required hence saves time, also prepared in less oil :). Lets quickly dig into the ingredients following the method.

Video link :

Ingredients :
  • Chicken on bone : 500 gms
  • Onions : 2 medium sized (finely chopped)
  • Tomatoes : 2 medium sized (pureed)
  • Ginger : 1 tbsp (minced)
  • Garlic : 1 tbsp (minced)
  • Bay leaves : 2 nos
  • Cloves : 4-5 nos
  • Cinnamon stick : 1.5" long
  • Red chili powder : 1 tsp
  • Kashmiri red chili powder : 1 tsp
  • Turmeric powder : 1/2 tsp
  • Coriander powder : 1 & 1/2 tsp
  • Garam Masala powder : 1 tsp 
  • Dried fenugreek leaves/kasuri methi : 1 tbsp
  • Yogurt : 2 tbsps
  • Oil : 2-3 tbsps 
  • Fresh coriander (handful)
  • Salt as per the taste
Method :
  • In a hot pan (try to take deep bottom pan) add oil, then add the whole spices - cinnamon, bay leaves and clove. Let them release their flavor in oil then add onions and saute till you get a nice golden brown colour. 
  • Add the washed chicken pieces and fry till the chicken changes its colour. 
  • Then add all the dry spices - red chili powder, turmeric powder, coriander powder, kashmiri red chili powder (for reddish colour) and 1/2 tsp of garam masala (rest of it we will add at the end). Give it a mix and add the salt as well.
  • Add pureed tomatoes and saute until oil oozes out.
  • Then add yogurt and mix well. Add water, cover and let it simmer unless the chicken cooks.
  • Once cooked well, add rest of the garam masala, dried fenugreek leaves and mix well. 
  • Garnish with fresh coriander leaves.
Enjoy with hot phulkas, rumali rotis or steamed rice :)

For the Rumali roti recipe please click here
 
Note : 
  • You can add ginger/garlic paste instead of minced.
  • The authentic way to prepare it is with Mustard oil, but here I don't get it of a good taste hence I used olive oil.
  • Chicken's cooking time varies from place to place, it took only 10-15 minutes for my chicken.
Please do share your experiences and feedback with me in the below section of comments or on my Facebook page. I too have a You Tube channel please do visit for all the video recipes. All the links mentioned below :) 
Thanks & Happy cooking 
Priyanka

Friday 20 June 2014

Veg Pulav/Pilaf with Soyabean Chunks


Hello Everyone, today I got a vegetarian Pulav recipe for you all. Its perfect alternative for biryanis, very delicious and my all time favourite. Its my mother's recipe and she used to prepare it with just whole spices (Garam Masala), which are all mostly dark colored with rice so while we were kids we used to call it "black & white pulav". She used to add soyabean chunks which were like cherry on the cake. Some times she also added jack fruit to it but only during its season. Its a super easy recipe and always a hit in my house. Sushant loves to eat it with just plain curd and homemade aam ka achar. So without wasting much of the time here you go with the ingredients following the method.


Ingredients :

  • Basmati rice/Any long grain rice : 1 cup
  • Soya chunks : 3/4 cup
  • Onions : 1 cup thinly sliced
  • Cumin Seeds : 1 tsp
  • Bay leaves : 2 nos
  • Cloves : 4-5
  • Cinnamon stick : 1 large size
  • Black Cardamom : 2 big or 3 small sized
  • Green Cardamom : 4 nos
  • Mace : 1 small sized
  • Star Anise : 1 nos (optional)
  • Black Peppercorns : 1 tbsp (Coarsely crushed)
  • Whole red chillies : 2-3  
  • Oil : 2-3tbsps
  • Salt : As per the taste
  • Water : 2 cups (appx)
Method :
  • Soak rice in water for 10 minutes. Drain the water completely and keep it aside.
  • Soak soya chunks in salted boiling water for 10-15 minutes. Once soaked properly, squeeze them and keep aside.
  • Now, in a pressure cooker heat oil, when its medium hot add cumin seeds, let it crackle, add cinnamon stick, bay leaves, both cardamoms, cloves, star anise, mace, whole red chillies. Let them saute for few seconds, let them release their flavours. Then add thinly sliced onions and fry till they are golden brown. 
  • Once done add crushed peppercorns and soya chunks, mix well and saute for a minute. 
  • Add drained rice and salt (I used 2 tsp), give it a gentle mix and finally add water (I added 1+3/4 cups), it varies as per the variety of rice, usually it takes double the amount of rice. Let it come to a boil, close the lid with weight, let the flame be on high. 
  • As soon as you get the first whistle lower the flame to low and cook for another 4-5 minutes. 
  • Switch of the flame and let the pressure completely subside. 
  • Open the cooker, let it sit for couple of minutes, then gently mix with a fork and serve.
Enjoy it with plain yogurt, pickled onions or mango pickle.

Please do share your experiences and feedback with me in the below section of comments or on my Facebook page. I too have a You Tube channel please do visit for all the video recipes. All the links mentioned below :) 
Facebook : https://www.facebook.com/cookwithpriyanka

Thanks & Happy Cooking
Priyanka

Tuesday 17 June 2014

Mango cake (Eggless, butterless)


Hello everyone, today I am very happy as after a long wait I got to find some really good and nicely ripped mangoes here. Though they are not Asian but still have a very nice flavour. I was seeing so many posts daily related to mangoes, as Indian markets are flooded with them. But did not prepare a single one due to unavailability of mangoes here. As soon as I saw them, first thing came to my mind was cheese cake and as soon as I went to buy cream cheese, kept it down immediately because of its huge calories, I am struggling to loose and on the top of it "cheese cake" no ways!!!!!!!. 


These were nicely ripped, so had to make something from them. Therefore baked a sponge cake which eggless and butterless too (So finally succeeded to shed few of the calories but not much). I poured the mango glaze on the top which was super yummmmm and decorated with some finely chopped mangoes. The cake was moist and fluffy, glaze took it t other level and the mango pieces gave it natural freshness. It was a great treat to us an you won't believe Sushant galloped it like anything. So here comes the ingredients following the method :)


Ingredients : 
As usual, I have divided the ingredients list in two parts- the dry & wet ingredients. This way it will be easy for you to follow. 
Dry ingredients:
  • All Purpose flour/Maida/Plain flour - 1 cup
  • Baking Powder - 1 tsp
  • Baking Soda - 1/2 tsp
Wet ingredients : 
  • White granulated sugar - 1/2 cup
  • Thick Yogurt - 1/4 cup (at room temperature)
  • Vegetable Oil - 1/4 cup 
  • Mango puree - 1/2 cup (Freshly squeezed)
  For Sugar glaze  
  • Icing sugar/Ground sugar - 3-4 tbsps
  • Mango puree - 1/2 cup
Finely chopped mango to decorate.
Method : 
  • First preheat the oven at 180°C. Grease & flour the baking tin of 6-7" diameter, or line with parchment paper/Butter paper. I took a loaf tin.
  • Sieve the dry ingredients together atleast 3 times and keep aside, this give more aeration in the flour and helps in making the cake light.
  • In other bowl mix sugar + yogurt and whisk nicely, you will get a very nice texture. To this add mango puree, oil and mix well. After they are well combined add the dry ingredients and fold in gently. Don't overmix, just make sure all the ingredients are well combined.
  • Pour the batter in tin.
  • Bake it on the middle rack for 45-50 mins or unless a tooth pick inserted in the cake comes out clean. Mine took exactly 47 minutes. But keep checking after 45 minutes as every oven vary as per the power and also the type of tin used :)
  • When done, take it out and give a rest of 2 minutes in the tin, then demold and cool on a cooling rack.
  • Prepare the sugar glaze - In a pan take sugar and mix in mango puree, whisk and cook on medium flame. The sugar will dissolve. Now let it cool. Once cooled will thicken.
  • When the cake is completely cooled, pour the glaze and let it set for 5-10 minutes. You can finish it with some spatula even. Sprinkle the chopped mangoes on top and sprig of mint. Slice it and serve.
Enjoy !!!!!!

Note :
For Mango puree, simply blend roughly chopped mangoes in a blender without water.

Please do share your experiences and feedback with me in the below section of comments or on my Facebook page. I too have a You Tube channel please do visit for all the video recipes. All the links mentioned below :) 

Thanks & Happy Baking
Priyanka :))) 


Monday 16 June 2014

Spiced Carrot cake with walnuts (with eggs/eggless recipe-both)


Happiness is when your beloved Husband bakes his first cake while you're asleep and that too without any occasion. Sushant baked his first cake early morning, without any of my directions and also without any recipe. I was surprised to see the texture, it was just perfect. He woke up early morning and baked it. We didn't have any such plans but still he did it. Felt like I was on the top of the world. Though he was beaming a lot after it, but anything for this lovely cake :)


As it was a morning surprise hence I clicked it on the bed only. After a lot of tantrums, he wrote the recipe and sent to me, hence sharing with you all.

Ingredients :

  • All-purpose flour/ Maida – 1 and 1/2 cups
  • Baking powder – 1 and 1/4 tsps
  • Baking soda – 1/2 tsp
  • Cinnamon powder – 1 tsp
  • Nutmeg powder – ½ tsp
  • Brown Sugar – ½ cup firmly packed
  • Granulated white Sugar – ¼ cup
  • Grated carrots – 1 and ½ cups
  • Walnuts – 1/2 cup chopped
  • Vegetable Oil – 1/2 cup
  • Large Eggs – 2
  • Vanilla Essence – 1 tsp
Method :
  • Preheat oven to 180°C. Grease and dust a 6” diameter round pan.
  • Sift flour, baking powder, baking soda, nutmeg and cinnamon and keep aside.
  • Coat the chopped walnuts with a tbsp of flour mixture and keep aside.
  • In a bowl mix the brown sugar and the grated carrots and keep aside for 8 to 10 minutes.
  • In a large bowl whisk eggs, sugar and oil together. Now add the vanilla essence and whisk.
  • Now add the grated carrot+sugar mixture and mix well. Add the flour mixture in small portions and gently fold in. Also add the walnuts and fold in.
  • Transfer the mixture to greased pan and bake for 45-50 minutes or until a skewer inserted into center comes out clean (cover loosely with foil if over-browning). Stand in pan for 5 minutes. Turn out onto a wire rack to cool.
Enjoy warm with any ice cream or with coffee or tea. 
Notes :
  • If you don't have brown sugar simply replace it with white one. 
  • For the eggless recipe, simply replace 2 eggs with 1/2 cup of thick yogurt/curd and follow rest of the same recipe. 
Please do share your experiences and feedback with me in the below section of comments or on my Facebook page. I too have a You Tube channel please do visit for all the video recipes. All the links mentioned below :) 

Thanks & Happy Baking
Priyanka and Sushant


Friday 13 June 2014

Braided bread stuffed with Paneer (Cottage cheese)


Hello everyone, today I have a very interesting and beautiful looking bread recipe. It was an experiment in my kitchen last night and yes I did it :). I would say that it might look very difficult to you but believe me I found it to be easiest of all. 

These days in CAL we are just talking about the yeast behaviors and variety of breads that can be made. In this regard we planned for an event for 3 days, in which every interested person would submit his/her thoughts, pics, recipes and many more in it. Hence I was fully motivated to start up with this beauty. Second comes the filling part, this is the most adjustable part of the recipe as you can stuff any thing weather sweet or savoury. I planned to make it a vegetarian savoury version and for me Paneer with colourful bell peppers was the best option. It has a nice crunchy crust and inside its quite soft and have all the flavours. So here is the ingredient list following the method :)

Ingredients for the dough :
  • All purpose flour/Maida - 2 cups
  • Active dry yeast - 1 + 1/2 tsp
  • Sugar - 1 tsp
  • Salt - 1/2 tsp
  • Water - 1/2 cup (Luke warm)
  • Milk - 1/4 cup (Luke warm)
  • Oil - 2 tbsp
  • Egg + 1 tbsp of milk for glazing (You can use only milk as well and omit egg)
Ingredients for paneer filling :
  • Paneer/Cottage cheese - 300 gms 
  • Bell peppers/capsicum - 1 cup chopped finely (If possible use multicolour)
  • Onions - 1/2 cup
  • Tomatoes - 3/4 cup (finely chopped)
  • Ginger/Garlic - 1 tbsp (finely chopped)
  • Fresh Coriander - 3 tbsps
  • Turmeric powder - 1/4 tsp
  • Red chilli flakes - 1 tsp (or as per the taste)
  • Garam Masala - 1/4 tsp
  • Salt - as per the taste
  • Oil - 2 tbsps
Method :
Preparing the Filling :
  • In a pan take oil, add ginger garlic and saute, when done add onions and saute till light brown. Now add the bell peppers, tomatoes, dry spices, salt and mix well. Let it cook for 2-3 minutes and then add crumbled or grated paneer, mix well cook for a minute more, add chopped coriander and let it cool.
For the Dough & bread :
  • Starting up with the dough, combine together yeast, Lukewarm water and sugar in a bowl, stir and keep aside for 10-15 minutes or until it starts to froth. Once you see a frothy texture that means the yeast is ready to use. Now in a bowl take all purpose flour and salt, mix and knead the dough with yeast mixture and milk as well. Try to knead a soft dough. the quantity of milk can be adjusted. When the dough is almost done apply oil and again knead. Knead the dough for approximately 8-10 minutes or unless you get a nice soft and smooth dough.
  • Place the dough in a large greased bowl and brush the top with oil, cover with a kitchen towel and leave aside to rise in a warm place until doubled in volume. The best place I find is my oven keeping its light on (for about 1-1 1/2 hours).
  • Once risen, punch down the dough and divide this into 2 equal parts and shape them into smooth flat balls. 
  • Now with the help of a rolling pin roll them to a rectangle with 1/4 " of thickness and place the filling in the center (just spreading it in appx 2" of an area. 
  • Using a pizza cutter or sharp knife, cut each side into strips about 1" wide down each side, leaving the center with filling uncut.
  • Fold strips of dough into the center, crisscrossing the filling by alternating strips from each side. 
  • Lightly press ends to seal, and straighten out the braid with your hands, if necessary, to straighten.
  • I was in a hurry last night so forgot to take the process pics. Hence found same kind on Google and sharing it with you all. 
Note : the picture shown below is not at all mine, but its just for your reference, Courtesy : Google images

  • Beat an egg with milk and apply gently with a brush on the top of the braid. Also you can sprinkle some sesame seeds if you like. Transfer it to a baking sheet and bake the braid in a preheated oven at 200 ° C for 25 minutes, or until golden brown. 
Enjoy !!!!!
Note :
  • Filling can be completely of your choice, weather vegetarian or non vegetarian.
  • Be careful while transferring the braided bread onto the baking sheet, or you can roll the bread on a baking paper and lift it to keep on the sheet.
  • If you are not an egg eater, then simply apply mil.
  • The size of the bread depends on you, if you want you can make even 3 braids out of this dough.
  • 50% of whole wheat flour can also be used.
Please do share your experiences and feedback with me in the below section of comments or on my Facebook page. I too have a You Tube channel please do visit for all the video recipes. All the links mentioned below :) 
Thanks & Happy Baking
Priyanka